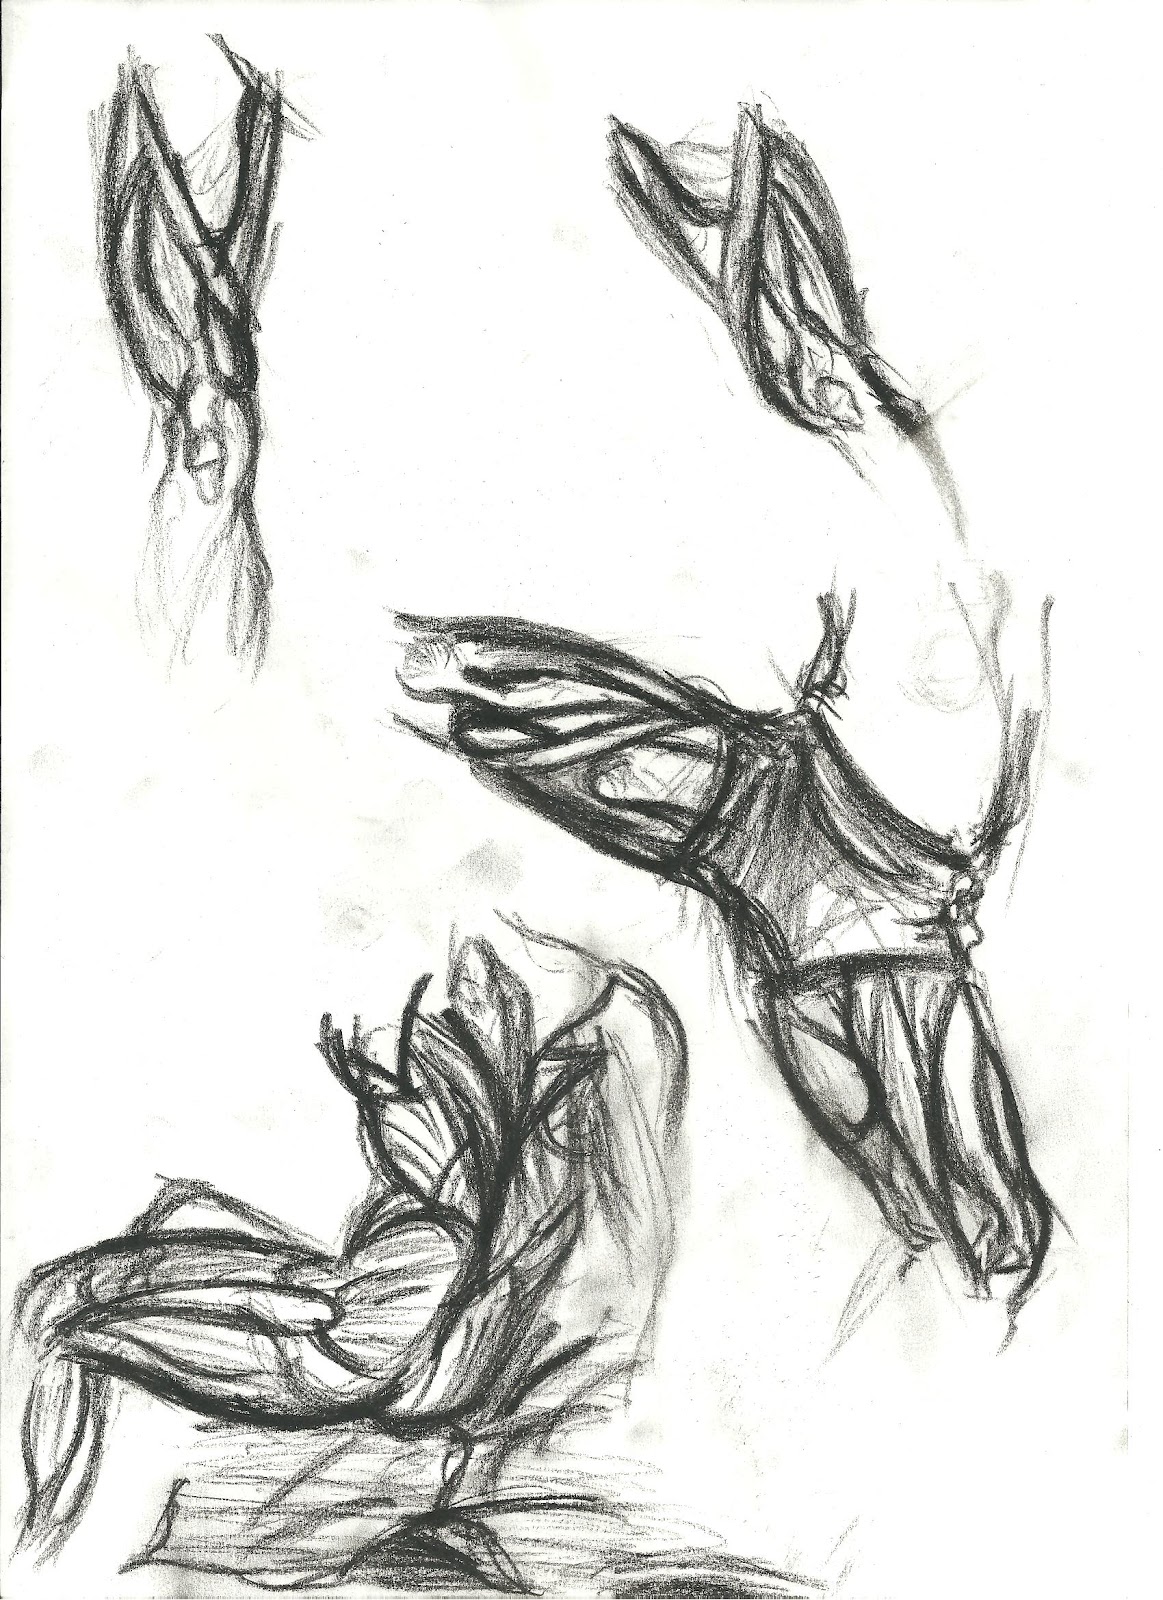
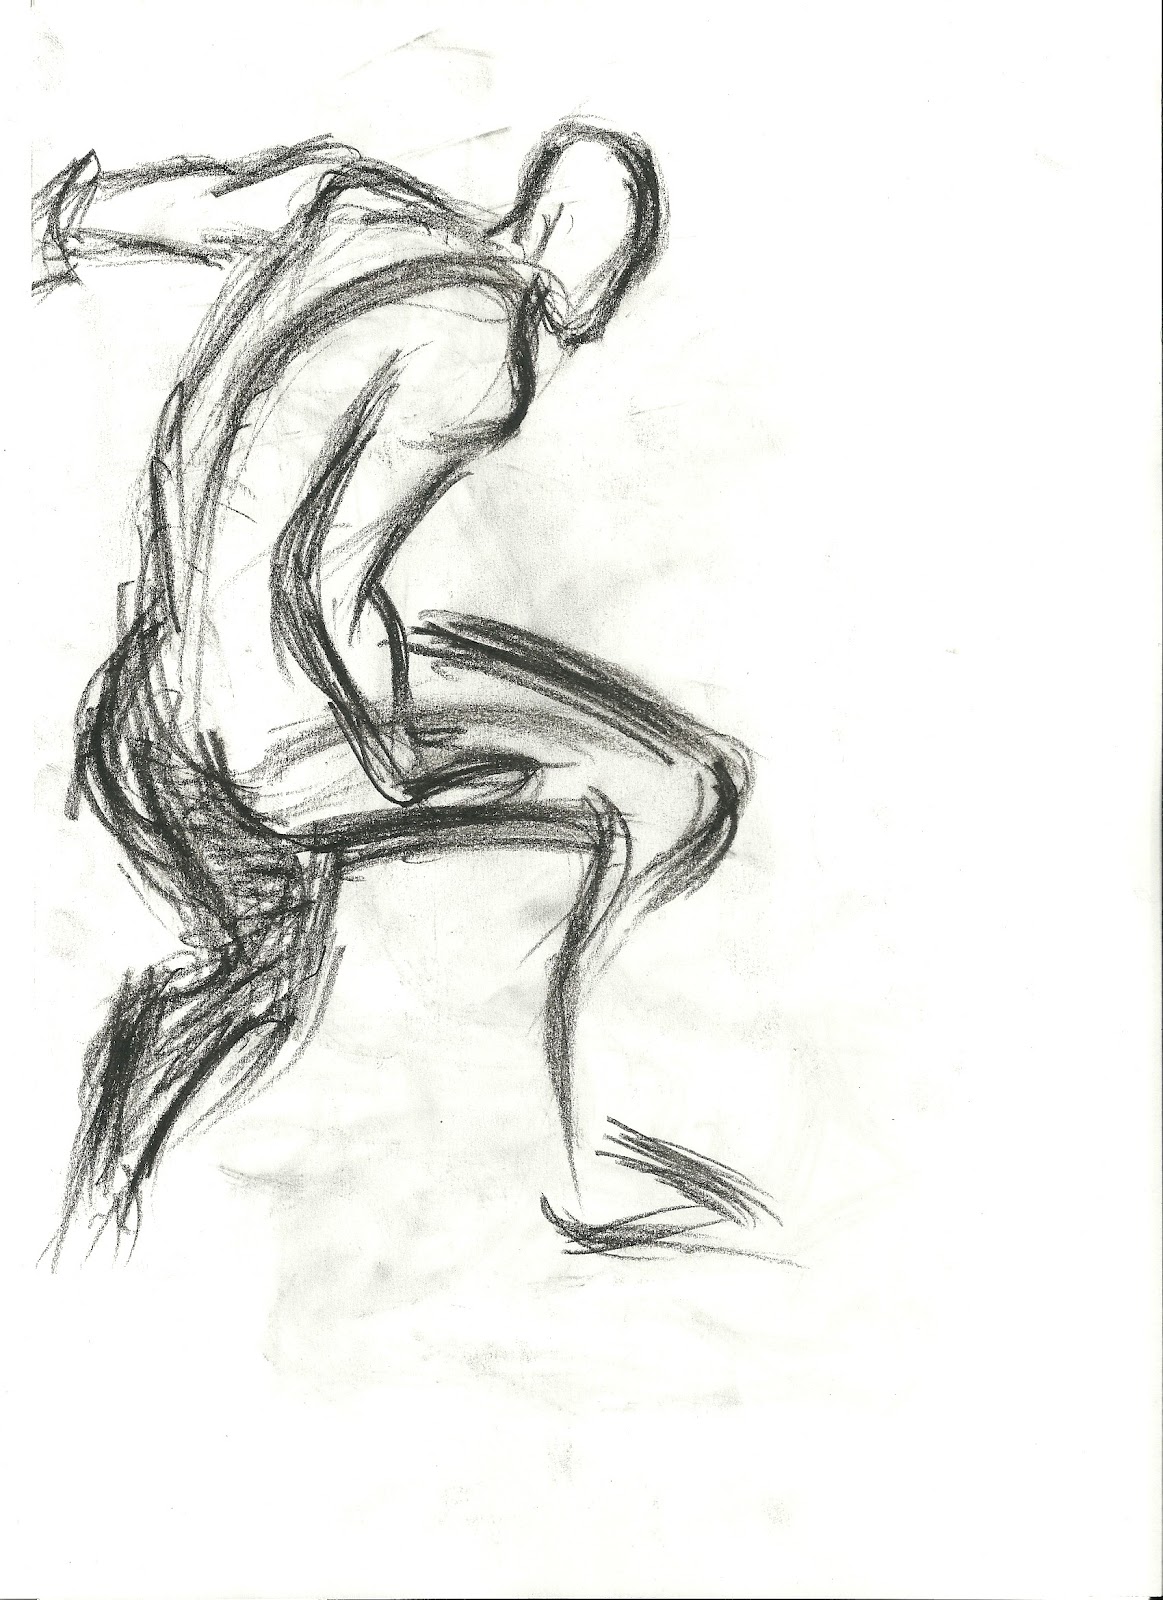
Me and Few of My friends decided to Draw at least 10 Gesture Drawing every Day.. Its Been really Fun to and I have Decided to draw Daily.. because I don't Want to Flood this Blog with so many Drawing I decided to Create a Separate Blog to Post just all thise Gesture Drawing.. . :D
This Weeks Lecture Was About
Advance Overlapping Action and Anticipation by Bobby beck and Shawn Kelly..
They Talked to us about Overlapping and Anticipation. And Also gave us a Quick
Review of what they Talked about Overlapping and Anticipation in the Previous
Lecture.
They Talked to us about how
Overlapping is Based on Lead and Follow
Concept and and Also showed Us some Video Reference explaining How overlapping action were happening in the
Human Body and other objects and animation. When We create our Breakdown or
even when we are Planning Our Shot we should not Only Remember to Have nice arc
in our Motion but to get some Nice overlapping action in those Breakdown. With Out Overlapping Aciton your Shot
with Still Look a bit Weird even if You
have a Great Arc in it.. There Was an
Example my Mentor Showed us explaining this..
We should also Always Make
sure to have some Reversals In our Poses. Reversals Help in making out Shot
Look Better. Reversal Help us Give contrast in the Shape in our Shot. We should Not Just Copy from our Reference we
can look at our References and decide
and Push the poses where ever we can. We
should Always know What leading What because that is going to Effect the How
the Body part overlap.
Anticipation is Something
which is also Very Imp . With Out anticipation your Shot Will look a
weird. The Main reason to use
anticipation is that so that we can lead our audience Eyes and Make them ready For whats Going to Happen
Next. Without Anitipation your Might not see What Happened in your Shot
Specially If It’s a Sudden and Fast Movement and get Confused. We Can Sell a
Really Fast Motion With a Proper Anticipation Placed Before it. We Should Always Remember where is the Energy
Coming from.
Anticipation Doesn’t Always have to
be Big and Huge, The mass is evenly distributed around the Fulcrum ( or
what we call center-line of gravity ). `We Should Always try not to always choose a cliche anticipation,
try experimenting with something new.
This Weeks Lecture Was about Locomotion in the Human
Body by Dave Mullins. In this Lecture he
shot A lot of Video Reference Of Himself and Was showing us All of them
explaining How the body IS working.. Its was Super Cool.. I am not sure If I
can Explain all of them With words…I Think It was something That Was easy to
understand if We Look at it with our Own eyes…
He Talked to us about how
Fulcrum is the Point of balance in a character or a Object and that the
mass is evenly distributed around the Fulcrum ( or what we call
center-line of gravity ). à How Very Motion \
action is Cause due to some Force.. àAnd
How how Body Tends To Counter Balance
itself when it Lifting something heavy ,
or even when it walking \ running. àAnd How Different Body
part Work or are involved when we Walk \ run or lift something heavy.
The Main thing is that We should
always Shoot Our Reference and Study and Understand of the Body mechanics are
working before we actually Start animating.
This Weeks Lecture Was About Arcs and Path of Action.. and Important
Principle In animation.. Arcs
can add more to animated scenes than any other animation principle, it could make
a Shot from Good to Great Or WOW!!
Arcs and Very Important And as we know almost
everything moves In Arcs. Even In a Human Body everything Moves in arcs. But
Our Eye Don’t move In Arcs they tend to move in a snappy, poppy
fashion…. Adding arcs to any action in your Animation makes the
performance more believable of your
characters because it will feel more organic. They Help in Making the Shot
Fluid and Organic.
'Straight inbetweens completely kill the essence of
an action'
Without
Arcs the Animation Feels Robotic. We should Always Remember That Computers are
machine and Not artist. They would always add inbetween with Even spacing and
Straight arc to your Poses. Its really a good Idea to grab a scene from
your favorite animated movie ( Disney movie.. I like Disney )
and choose a part of a character, like the nose, or the hips...
& track it on your monitor with a dry marker, you'll be
AMAZED to see all these arcs flowing, that's one of the reasons that makes
these movies alive & iconic.
We should always plan our Arcs even before we
actually start our blocking, because in the end it will make the process of
tracking arcs a lot easier. You can use different tools to Track your arcs.
Such as Motion Trail , Arc Tracker
, AC 3d Tool or you can even use a Simple Marker and Draw
on your scene to help to track and check your Arcs.
I am really Taking a Lot of time to update my Blog regularly..
The Last Few Weeks got a lot more busy..
Actually Its Current the End of Week 4 Now… and I am still working on my
shot..
But let’s get back to
Week 2.. In weeks 2 we had an Another Blocking to Final Lecture from by Dave Burgess .
In this he showed up his workflow of animating an entire shot from
start to finish. Every animator develops his/her own way of working, and
'looking over their shoulder' as he/she animates is always a great learning
experience. Like Always he Also showed us How he would think of his Idea,
record Reference, Draw thumbnails and then Start Blocking.. This is Like Basic
of Everyone’s Workflow.. Think about your Ideas\shot, Record some Reference,
Draw your Thumbnail’s, and then Blocking, blocking Plus, Polish etc….
Another Imp thing tip that he too suggests that we should always Set and
Fix out Camera before we actually start Blocking in Maya.. And another thing would be we should also
always Remember that we are Posing our Characters properly.. I mean.. Even if
I'm just turning the head, I will also rotate the neck and upper spine joints a
bit. I also try to add small foot movements as well. Many junior animators often forget to rotate
the neck and just keep on rotating the Head without rotating the neck or it
effect the rest of the body... And Well it almost Impossible for you to move
your head without it affecting your neck. And the rest of the body a little. We
Have to Keep stuff like this in our head when we are posing our characters so
that we can make our shot organic and Believable.. The same thing with the
shoulders Also.. It sometimes also often gets forgotten by young animators..
Well it’s really heard to write down the experience that we get by actually
Watching an Animators animating… but I will try my best.. It’s Basically That We have to Remember to
add those little Changes that happens and a Body moves and those Tiny things
really adds life to your Characters..
And For this weeks Assignment We had to submit our Blocking My.. here's my Blocking Pass assignment...
Awesome Term 3 has Started!!! And this Term is Got Jason Taylor Another Awesome Animator guide me Through My journey in Animation Mentor... He Got Some Great Reels.. U'll can Take Some time and Check it out if u'll want..
In This week Lecture Carlos talked to us Abt
Staging and Composition. Abt Camera how we should stage out Shot to Make out
Shot Clear. We stage things So that the Story is clear to the Audience using
all the Elements Available. Lots
of things are involved in the staging process, Characters, Props, Set.. etc., Camera
Angle/lenses, the action that will take place in the shot.
We should Always Keep our staging clear And Simple.. DON'T CONFUSE THE
MEDIUM WITH THE MESSAGE... The most important thing about staging
is clarity, you should make sure that the idea & the point of the
shot is very clear to the audience while staging.
Keep
it simple, and keep your full concentration on the message that
you're telling the audience; Staging (with its simplicity) should
help conveying that message.. Not confuse it!
SHOT: - Shot is a Continuous view filmed with one Camera Without any
kind of Interruptions.
There
are different Types of Shot Types used in Cinemas some of the Most
Common among them are...
Establishing shot
(usually used at the opening of the scene)
Long
shot
Medium shot
Close-Up
shot
High
Angle shot
Low
Angle shot
Over
the Shoulder shot (used when having two characters in the scene)
Point
of View shot (to show what the character is looking at)
Takes:- Multiple Versions taken of the same Shot to Find the Best Fit for it.
CUT:- How one Shot Related to another Shot.
Scene:- Place or Scene where the action is Taking Place. A scene can be One Shot
or a Series of Shot, Showing a Continuous Event.
Type
of camera moves: Pan, Track In/Out, Dolly,
Crane, Boom, Tilt Up/Down.
Type
of camera lenses: Long Lens 100-200mm,
Normal lens 35-50 mm, Short lens 10-20mm, Normal lens are the most appealing to
the human eyes.
We
should ask ourself while staging our shots; what
I'm trying to tell the audience with this camera angle? Why I'm moving my
camera? Some great animations that gets messed up by un-necessary camera
movement.. The camera should move only for a purpose.
Good
reasons for animating the camera would be: following a character, emphasizing
on a character's reaction, revealing an important element in the scene, or
maybe creating a sense of action.. But avoid camera moves that are pointless,
or will distract your audience from the main subject.
You can Also Check out this Site which has Some Awesome Info Abt Staging..
Would Surly Recommend u'll to look at it...
I
love this One from that Link. It’s really great...In this One it’s So
Clear that That family head off to the Church, and the Dad elects to
Stay at Home..
It’s a very Simple Staging but it tells us the Story just by looking at
this One Single Image..... Now we should try to get Staging like that in
our shot so that It makes our Shot clear and Helps
our Audience to understand the Goal of the Shot easily and
they don't have to guess what’s Happening.. If
the audience are guessing what’s happening in ur Shot
then that means Ur Staging is Not good enough..
And For this Weeks assignment We had to Submit our Planning For our Shot.. Here's My Planning..
After All the Fun,Sleep Less night and Having Fun on Google Hangout.. haha.. Term Two is Finally Over!!
It was an Awesome learning experience with Jon Collins.
This Week I also Got A few Notes from My Mentor abt on wht Areas He thinks I should work more on to Improve Myself...
Areas of strength: Anuj was an awesome presence
in class this year! He was an all around great student, in both his
animation work and his involvement in our weekly Q n A's. He was
consistantly one of the few students to actually bring questions to ask
every week.
Animation wise, i really like the stylized approach Anuj has to his
animation. His posing is very strong, and he really looked to push the
contrast in his timing and spacing. His planning for each assignment was
above and beyond the base requirements, with really nicely executed
thumbnails, and sometimes even 2 D animations to flcuh out his idea. His
blocking was always very clear and concise, and the level of work
completion for each step of the animation process was always nice and
refined, culminating in nicely polished animation.
Areas of improvement: The things Anuj did well
this term far exceed the number of things he really needs to focus on
improving, but here are a few specific things to try and refine.
Squash and stretch - At times, Anuj went a little overboard with how
often and how much he was stretching limbs. Remember Anuj, we want to
feel squash and stretch, not see it. This is especially evident in his
work when watching IK legs that slowly continue to grow for 6 plus
frames after locking out.
Moving holds - Really look to increase the naturalistic feeling of your
moving holds so the character doesn't freeze or robotically continue
moving when in a moving hold. Also, be conscienscous of how you are
easing into and out of all your poses Anuj, at times there were hard
hits and sudden starts to your moves.
Overlap - Although there were definitely times when you used overlap,
look for instances to loosen up your torso transitions a bit more by
increasing the amount of overlap you layer in as you move up from the
root.
Polish - Although your level of polish is already really good for class 2
Anuj, you're good enough to start really plotting and nailing every
single little detail and arc, so start using that arc tracker as much as
possible!
This week the Lecture was a Review of all the Lecture we had Till now.. its Like a Short Version of all the Lecture we had in this Term...It was Very helpful.. To review at once again before We move on to the Next Level of Animation.. :P lol..
For this weeks Assignment.. We had to Compile all our assignments Till now and Make Our Progress Reel...
In this Lecture Kenny Roy Showed Us a Student Shot labelled Final and Then Added A Extra Layer Of Polish on it, subtle anticipation, smooth arks.. etc
The Best That I Like In this Lecture Was. .
- We Should Always Step away from the shot for a while then come back with a fresh eye. Working On the Shot again and Again continuously will make U get Used to it.. U will Stop Seeing ur Mistakes.. Going out For a Fresh Eyes and Then Cmg Back Will Really Help u too See all ur Mistakes. .
- Every Day When U first Start Working On ur Shot In the Morning.. Instead Of Just Starting to Work On it Directly We Could First Watch Our Shot And Note Down All the thing that We See and wanted to changed then start Working on the Shot..
- Always Observe the Center of Gravity Of ur Character.. and Sometimes It better to Hide the legs & work on the body/waist first, then go back to the legs.
- Trying to Avoid Twinning of feet or arms (in timing & posing )
And then For my Assignment This Week we had Submit the Final pass of our Shot.. I made Those Changes that My mentor Suggested me Last Week.. and I think It Helped my Shot Lot.. He Liked this.. but There Still A Few More Changes That I was Suggsted.. Still need To Work in..
In this Week We had another Walk-though A shot By Rick O’Connor In Which He Should His Method of Animating. How he Would
- Plan,
- Record Video Reference,
- Study Video Reference ( This was the Part That I really Loved in this Lecture, He Showed Us How He would Select the Main Poses From his Reference and then Exaggerated ) ,
- Draw Thumnails,
- Blocking ,
- FEEDBACK ( Imp Step ) ,
- and then Making those Changes after Getting the Feedback..
and For This Weeks Asssignment I had to Refine my SHot and Submit It.. Here's wht I submited.. .
This Week we had Lecture on Timing and Spacing another IMP Principle from the Principles Of Animation. As it is Said " ITS NOT IMP WHT GOES ON EACH FRAME OF A FILM, ITS THE SPACE BETWEEN THE FRAME THATS IMP " Timing and Spacing are core principles of animation and are concepts that are closely intertwined. Just Playing with the Timing and Spacing of a Ball u can show That Ball is Heavy or Light.
Here is an interesting quote from Timing for Animation, Second Edition p.2-3.
“Timing [and lets add Posing] gives meaning to movement. […] In nature, things do not just move. You can draw a circle and declare it to be anything from a soap bubble to a cannon ball. We the audience will only understand what it is when we see how it moves and interacts with its environment. […] So in animation the movement itself is of secondary importance; the vital factor is how the action expresses the underlying causes of the movement. With inanimate objects these causes may be natural forces, mainly gravity. With living characters the external forces can cause movement, plus the contractions of muscles but, more importantly, there are the underlying will, mood, instincts and so on of the character who is moving.”
TIMING :-
Timing is the phrasing of movement—like music.
Timing is first developed by where you decide to put your key poses.
SPACING :- how the drawings, or poses, are positioned between the timed keys. It’s
the spacing of your drawings that is going to show
acceleration/deceleration. Richard William's has Explained Timing and Spacing very Nicely in His book.. For Example.. Timing is when the ball hits the ground, as for Spacing its how you place the in-between frames of the ball arcing through the air.
There are a number of elements that influence timing in a shot : Weight, External / Internal Force, Momentum, Animation Style. A great advice would be to never Let Maya make the in-betweens for you.. It will make ur Spacing Even And Boring and Sometime Weight Less.. add Ease in and Outs will ur Spacing Interesting.. Just making Small Changes in the Timing / Spacing can have a Huge Effect in ur Shot.
There is a Webinar on Animation Mentor Home Page in which Aaron Hartline and Victor Navone Talks Abt timing and Spacing Very Clearly.. Its a Great Webinar and I would Strongly Recommend to Check it Out.. http://www.animationmentor.com/webinar/timing-and-spacing-webinar/
ASSIGNMENT : - This Week We Had to Take Our Shot to the Next Level.. I had to Make A lot Of Changes in Shot depending On my mentor's Critique but It Helped A lot.. The Shot is Looking Way Better than Wht it used to be..
This Week we had Lecture on Arc and Path of Action another Principle from Animation Principles.. We must Always Make Sure That we a Good Great Arc in our Shot.. Like its Said Every thing Moves in an arc.. With out arc ur shot Starts too look Jerky , Robotic etc.. Characters RARELY move from point A to B in a straight line there is always An arc in every Motion.. Arcs will add a Great Deal of fluidity, elegance, flow, grace, appeal to ur Shot and U can try to exaggerate it as much as u can to make ur shot Interesting.
Arcs & Path of Action are greatly related, they always go hand in hand with each other..
Every time there is a motion there is a path for that motion, that path is called path of action. The path of action -in most cases- has an arc shape. In animation we need to make that arc smooth & clean to add quality to the shot, bumpy path of action will weaken the animation no mater how good the character posing is.
If you watch any animated Disney movie you will notice that it has a very fluid feel to it, that's all because of smooth arcs & path of action, and that what makes Disney work so remarkable!
Its all about two things: Arcs, and Path of Action.. along with
solid character posing, appeal, Spacing, Timing etc etc etc of course. lol..hahaha :)
There is plenty of tools in Maya for Ghosting, and showing animation path, or Another I learn't in AM was many animators Use DRY ERASER on the monitor to follow the path of an arc, helps us visualize this path easier or There are a number of software plug ins or scripts (such as Jason Schleifer's "Grease" tool for Maya) that will allow you to draw directly on Maya. I Personal Use a Script Called " Ghost Man " and AC3d Tool and Sometime " Arc Tracker " to help me track my arcs.. I Just Keep on jumping between these Tools depending on the Situation cause Sometime These end up to slow Down ur PC..
NOTE : - But arc are not always Required there will be some situation where u don't necessary want to have an action in an Arc.. Assignment:- This we Had we had to Block our shot.. Here's what I submitted.. The Constrain thing was Driving me Crazy Had to Waste 4-5 hrs try to get it Right.. but To Mike Amos he Suggested me to use ZV-parent Tool.. Helped me a lot
This Week we Had a Lecture From Wayne Gilbert..I think This Lecture Was Pretty Awesome... He Talked to us Abt Force how it Works And How we should Always think abt how the Force is Working in Our Shot.. cause Force is wht that Causes Movement..
Animation is not about moving characters from point A to point B, we have to know why we're moving these characters, & we have to think about the force behind the movement because : Nothing Moves Without a Force!!
There are Two types of force:
External Force: like a character puling / pushing, jumping... etc.. Internal Force: tells you that the character is a live and making its own decisions. While animating a certain action we DON'T just keyframe the main poses and let the computer figure out the in-betweens, its
up us Animators to direct the sequence of transforming between these
poses, How we get from one pose to the other, What body parts are
involved in the process, We need to make sure that the entire body of
the character IS involved in the movement but each with different level
of intensity..
So
Force is what part of the body is moving first, and the parts
that follows along, its setting up a sequence of energy
being released through out the body to make the movement. Its how we transition our characters from one place to the other, and that involves Lead & Follow, Timing, Path of Action, All the important animation principles that we're learning at AM. As for Internal Force its what's going in in the character's head displayed through external posing, its the acting, the personality, its the reaction in a certain situation.
A very good advice I got from Wayne Gilbert during the lecture: Animators should always have a reference to work with, analyze the motion in that reference, de-assemble it, study it carefully, then re-assemble it into your animation the way like it.
In this Week We had Polish our Final Shot and the Planning for the Next Assignment.. But Still The Thing That I think is Missing and I still need to work on In the Shot is The Texture In the Timing..
and Here's my Planning... This One Is Sure Is going to be a New Experience Never actually Animated a Shot with Hand and With Weight..
In this Week we had another Blocking to Final Lecture by Mike Stern On how He Would animate a Shot.. Mike was among the first group that graduated from Animation Mentor, now he is working at DreamWorks as a character animator. Check out his AWESOME Animation Mentor graduation short: Distraxion.
He showed us His Workflow of Animating a Shot.. How he Plans , Blocks, Spline and Solve Problem that Might Occur while Working on a shot.. Its Really Great Great To see How Diff animators animate.. Helps a Lot to Us Develop our Own Workflow..
We got to See How he Would Record Reference.. and and How He would animate a Cartoony Shot For which Recording Could Be or maybe hard\Impossible.. and sometime For shot Like That He said he Would try to Use his Imagination and the animation Fundamentals.. But I think we can Still Try to Find Something a bit Similar to Wht we are going to animate and take a Little Help From it.. :P .. lol
He Started with Posing minimal Pose that sells The Idea Clearly, time the Shot and then Started to Refine the Poses add more Breakdown etc to Clear up the Idea..Push thing around, Start to think abt the Path of action and How the The poses Work together with Each other.. THE SMARTER YOU ARE WITH THE BREAKDOWNS THE EASIER CLEANUP WOULD BE.. One this That I like that instead of Splining the Entire shot at Once He Break them Down into Section and then Work on them.. Like Just working on the First Step First and and then Move on to the Next step or next action.. I think This Helps In clearing Stuff Easily and Not Getting Overloaded with the entire shot getting Messed up when We first Start to Spline It.. :P
and For the Assignment In this Week we had to Start Refining our Shot.. Here is What I submitted.. .
Wow... Its Been a Months Since I posted something.. Damn.. But anyways..
In week 5 we had lecture on Weight and Balance.. and as always it was interesting..Rick Talked abt Weight and Balance in this Lecture on how Weight & Balance are crucial elements in animation, sometimes it
feels wrong even when watching a high budget animated movie from major
studios.
To create a solid character animation we need to understand weight &
balance in real life before we start applying it into animation.
In order for a character to be balanced; its weight needs to be evenly
distributed a long its center line of gravity, (the center line is the
vertical line that connects the supporting foot on the ground with the
base of the neck)
I had PDF which I found to be very Interesting and Helpful to Understand Balance and How to Check if the Character is in Balance.. Hope It helps U'll too..
In real life, a fat person requires more time and power to move forward
as well as to stop, same in animation, a character with a big mass
requires more time & energy to propel it self to obtain locomotion
than a smaller character would.
Balance wise, the faster the person is moving, the less balanced he is, the slower he moves the more balanced he is,
But if the person is completely balanced he can't move anywhere, therefor we need to break off that balance in order for us
to move around.
If you don't follow the rules of real life weight & balance while
animating a shot it will simply look lifeless, there is a fine line
between exaggerating the rules of weight and breaking them, you can
exaggerate the rules of weight but the one thing that you Can Not
exaggerate is balance, you can only break the balance of a character
during locomotion & that is about the
only time that your character is off balanced, like walk, run, jump, or what kind of locomotion you have for the character.
- A well balanced character is the one that all its parts are working with each other to balance itself.
- Extreme reversal action helps selling the idea of weight (for something like a pull, a push, or a jump)
- In order to sell the weight we should exaggerate our Pose as far as we can..
- Exaggerate the squash & stretch by compressing its body clusters closer together, or stretching them a part.
- When you're animating a character throwing a heavy object; make sure
to utilize the entire body to make that object go far... same principle
applies to a jump.
- make sure you're always Aware about how your Weight is Shifting in your shot
- act out and feel how the force is working In your body while posing your Character..
In this We had to Block out our Shot Here's My shot..
In this Week We had another Mentor Walk-through Us how He Will go through his Shot from blocking To Final.. It was a Really helpful... :)
This is We had to submit the Final Pass of the Assignment.. I still I have to work on it.. Maybe I would work on it when I have Some Free time Next time and Polish it up a bit more.. :)
In week
2.. We had a Lecture in which Dimos Showed demonstrated us how he would go on a
Shot from blocking to Final. It was a fun Lecture.. He showed us How we Blocks stuffs around and
How/when he starts Splining them..
Week 3 HIPS
In
this Week we had a Lecture just about the Hips…How Hips Works. Hips are the
Very Complex Are and they rotate in every angle and direction.. They are the Primarily
Place where most of the physical movement generate from. We always have to be aware of our weight
Shifts and Always know what is driving what in our shot. We should also always make sure that not
everything Move at the same time in our scene.. Different Parts of the body
start and stop and diff time..
Centre of gravity is a Static
Object is directly above or below the Point of Suspension.. We should try to get Appeal in our poses too
to get appeal in our Final Animation.. And Cartoony Movement is the exaggerated movement
of Real Life.. So it’s like just exaggerate what’s happening in Real to make it
Cartoony.. And Stat Studying Life..
In
this Two Week We had to Block and Refining our Shot.. This Is What I end up
With… But not Happy.. :(
I found This Tip On Alyssa Lee's Blog I really loved it so also wanted it to share it over here...
When exaggerating/stretching a pose:
Put less stretch into “solid” parts of the body, such as the head or
hands) and more stretch into the skinnier/elongated parts of the body
(such as an arm or neck). This will read better in motion as a stretch
rather than a deformation.
Wow!! Cool awesome! Term 2 Started….. Yay!! This week we had A lecture About What is Blocking and a mentor showed us how he blocks his shot..
Blocking Is not a Quick rough Crapy version of your Animation. Blocking is the Point where your Shots explains and shows clearly What exactly your shot is about and What exactly is happening in it.. It is the necessary poses or anything that is required to convey your ideas. ALWAYS RECORD YOUR REFERENCE AND USE IT AND PLAN THE HECK OUT OF IT BEFORE TO START BLOCKING ON YOUR SHOT.
Select your key poses and sketches them on paper. Key Poses are like the Heights, lowest, contacts , or where the character changes direction, holds, strarts from moving hold, straight legs or hands. THUMBNAIL YOUR KEY POSES ALWAYS. After your Blocked your shot always check it from other angles and not only the camera angle. Yeah it should work in camera view. But try to make some sense out of it even in the perspective view. Check your arcs, and path of action even in Blocking. Push your Poses.. TRY NOT TO COPY YOUR TIMING EXACTLY FROM YOUR VIDEO REFERENCE. It gets Boring. The Most imp of all GET FEEDBACK FROM OTHERS.
For this week we had A pick list from which we had to select one and Record reference ( oh!! Yeah we have to upload our reference on the site for others to see.. But I did it just closed my eyes and uploaded it..lol..hahaha)for it and plan it out.. here’s my Assignment for this week..
Wow The Last Week!! Can't Believe the Term is Over...This Week We had Bobby , Carlos, And shawn's lecture on The review of The entire Terms Lecture and And How Weight Effects the Walk of the Character...
This week We didn't actually have any assignment.. But we had to Compile or our work.. That we did in Term one and make a Progress Reel.. If necessary we can work on it a bit more and render it If we wanted to but it was not Required.... Anyways here's my Progress Reel.. .. Awesome Term One Done and I also have a AM progress Reel.. lol..haha
Wow Week 11!! The End in Near!! This week Lecture was All about human Anatomy.. and What exactly Happens when we Walk.. How the muscles in the Hips react which Muscles contracts etc… Lots of Info… was a bit confusing in the starting but I think after watching the lecture second time is begin to sink in…
For this week We had to Polish our Walk.. this would be the Final assignment of Term one… and we also had to draw poses showing The character is In balance and Pose them in maya.. Here’s my Assignment for this Week….
Ouch!! Weeks got a little Busy.. Haven’t got much time to post… But anyways Week 10!! This we had Lecture about Walk with character by Carlos.. It was fun.. Carlos lecture are always fun makes me laugh… In this he talked to us about Walks with different Character. How Every person walks differently. A heavy person walks differently than a person who is light… Even the Emotions, mood, Personality etc of the Character Effect there Walk..
Walks are important because They define who the Character is, what he is think, what he is feeling, his internal motivation etc.. Walk can tell us almost everything about the Character.. NO TWO CHARACTERS WALKS THE SAME –Richard Williams What can tell us How heavy or light the Character is, how is he\she feeling. That’s the reason many animation animate the new rigs They are testing just by first animating a walk with it.. They should be a reason behind the Walk. We should always remember at what point of the story is the walk taking place. Always think about the Physical attitude, weight, and If any the character as any injury etc. because all these things effect The Walk.. Almost every Principle is Applied to the Walks.. Overlap, Timing, spacing, squash and stretch, arc etc.. and Always make sure that your Poses are clear to read they should show the Weight and how the Character is feeling.. :D
For this Week we had to Plan out and Block our Personality Walk.. and draw Different Idea that shows that the Character is exhausted and Pose is with a bi-ped Character.. FUN!!
Here my Assignment for this Week…
Chad Really helped with much with this One...One good thing I learn't things I was having trouble with the run in the Air and Chad then told me That I was having the Arc if the leg overlap and should try to having a different Arc in the Legs and not have them overlap...That really Helped me alot... So much Fun... !!!
Wow Week 9 started..
This week we had Shawn Kelly talked to us about Exaggeration. How
exaggeration is Important in every animation?. Exaggeration in used in every
animation even in realistic animation. Exaggeration not only consider as
squashing and stretching in animation but exaggeration of Ideas, Personality,
Poses, weight, Timing etc..
Exaggeration is the Most
Important aspect if animation without it your animation will be boring. You
need to exaggerate your animation to make the audience the Goal. Our animation
is finally a 2d animation when it is shown on the screen so we need to
exaggerate our Ideas, poses, timing, weight etc. to make the audience What is
going on the Scene and to keep them interested. Even if you’re doing realistic
animation need to exaggerate it. Always Push your animation more even when you
think it looks ok push it more and see how it looks. We should exaggerate what we see in our
reference and just copy them frame by frame to make it interesting and not
boring. Exaggerate it to make sure the audience would be able to read it
clearly. You should exaggerate your timing also and not just copy them from what
it is in the reference. If there is a hold in the reference increase the timing
of the hold etc.
Exaggeration making
doesn’t mean making pushing something sometime you can also pull it back to
make sure the audience can read clearly what’s going on in the scene. For
example you can make the entire background black and white and just have the
character and the objects the character interacts with in color this lead the
audience eye directly to character and help the scene. This is also considers
as exaggeration. If the character is Sad make him sadder. If he is happy make
him happier.
But don’t exaggerate to
much that it distracts the audience from the goal of the scene. You should
select properly What you are exaggerating. Too much of exaggeration can also
confuse the audience. Like if you want to show that the character is picking up
a heavy bag make the bag super heavy. But remember to stay in the boundaries.
Even if you’re doing a wacky cartoony animation there should be a feeling of
weight in it.
For this week’s assignment we need to polish our vanilla week which we
submitted as blocking in the last week and create a concern pose. I felt that
this week was a it hard than the other. Specially the concern pose because
concern are close to Boring, thinking , worried poses. So I need to make sure
that my pose showed concern properly. But I Probably made this mistake the
first pose which I created was reading as much concern to me so I had to Redo a
new pose again. And the on the walks the knee’s where making me Crazy. I was
thinking to start over again but said that was looking great.. and don’t have
to change anything in it. But anyways guys Here’s this week assignment that I
submitted… Can’t wait to see What chad says about it.. :D
Hey Guys!! I thought I will share with u'll the Method That I used to animate my Pendulum. This method woks Only for the Settle and not for the Starting part.. and may not Work on body... Its Like It will not work in 9 out of 10 Cases... I just found it useful in this.. But I don't use this method when I am animate Body Mechanics..I think this methods is not too helpfull when used on Body mechanics..
So wht I did was I first Created my Extremes ( The Height pose's in the settle) . Depends on the number of swing your pendulum makes when it settles... I had around 8 maybe... So lets Think we have done our 8 swings.....
Then I just select the Controls and Flat the Tangent... Then Select the Bottom three controller Leaving the top one.. and move the keys two frames ahead.. and then De-select everything and select the Bottom two controls and move the frame again two frames ahead.. Again de-select and then Select the last controller in the bottom and move the Keys two frames ahead again.. ( Just move the frames ahead of just the settle part in the animation...I mean the frames of the settle part in the Pendulum animation... I left the rest the same).. and then Play ur Animation and see the magic...
I am sorry abt my English if I'm not able to make This clear enough.. But just Mail me anytime if u need anymore help with it.. anuj.animator@yahoo.com..
Finally Done with Tailor Got a few Little Critiques... Would make those Changes by the end of this week... This week in our lecture Bobby talked abt Walk.. and showed us how we could Animate a Walk.. And also animated a walk to show us.... It was really Fun...
Walks Are the Basics of animation.. Though we first animate a walk as the Basic to start learning animation... U can't get it right the First time... Its very Hard... Nobody Walks Perfectly.. Each step is Different.. But For general a vanilla walk is almost like 24 frames per Step.. This is Not for every body.. If you try recording youself... you will find that you sometime walk at 12FR, sometime at 16FR and sometime maybe at 14Fr.. OLD people walk slowly so they might me around 20Fr.... Its not always the same.. Each step is different.. And every person walks Differently and Walk also change depending on your Mood... But a basic Start we were asked to animate our First Walk at 12Fr...
Walks (and runs) are parts of some basic animations exercises as are the pendulum, the bouncing balls or the weight shift. Despite this, walks are not an easy subject and require some research before we start diving into them, as Shawn Kelly points out in one of his post. It's important to start with some reference, ideally some live-action footage.
There are Five Main poses in Walk:-
1] Contact
2] Down
3]Passing
4]Up
5]Contact
You might want have a look over these Site to get a much better Info on Walk...
1] Brendan Body's Blog 2] Francis Jasmin has Cool info on Walks ( checkout his rest of the Blog too its filles with some awesome Infomation..
and also Watch Richard Willams Animation Survival Kit He explanis Walks Very Clearly.. and If possible watch his Video's.. He explains walks in them in an awesome Way..
For this week we had to Submit out Blocking of Vanilla ( Just the Blocking ) and a Strength Pose...
Here's my assignment..
Week 7!! This going crazier and crazier... For this week Lecture we had Victor Navone Talk to us abt Spline and how to use them... I don't use splines Much but they Are really helpful and can help in getting nice Output... You'll should have a look at his Pages where is explains what exactly he Talks to us abt splines... Have a look at it even if u spline less in ur workflow...these are really helpful...
Ahhhhhhhhhhhhhhh!!! Its the Tailor... For this week we have to animate the Tailor... This is really hard to animate... Its going to made me Crazy and finally did... Had to sleep less.. However By this time of the Term my Sleeping timing are already messed up... I am not sure when or how much I sleep...
At Animation Mentor We have a a Twins actually many Twins... But The Pratt's Twins are the Best.. They Always post some great Information On everyone's wall that are really Helpful... This week Cameron Pratt posted this on my workspace I love it very much so thought to post it here too...
This week's assignment is very similar to last week's: take a segmented
object and give it overlapping action. So what's the big difference
between the pendulum and Tailor? The difference is that with Tailor, not
only are you trying to give your object a good sense of overlap, but your
new goal is also to get the ball and tail to feel like a living creature.
This means that the tail has to feel like it has some control over
itself, like a cat or squirrel's tail, and not flop around lifelessly
behind like last week's pendulum.
To get this feeling, the first thing we need to do is animate the ball,
or body of our Tailor rig. Just like animating the platform first in your
last assignment, animating the ball will give you the arcs, path of
action, and anything else you will need to get your tail moving nicely.
You can hide each individual section of the tail in the layers panel,
which will help you focus on getting the ball looking just right.
Now that we have our body set up, we can start on the tail. There are a
few ways you can go about this. The first method is to animate each
section of the tail at a time, starting with the root and working your
way up through the sections. The pros of this method is that you only
have to focus on one control at a time, which makes things a lot easier
to manage. Doing it this way also means you can use the pendulum trick of
copying the rotations of the first section, copying it down to the next
and offsetting it slightly. However the cons are that your tail might end
up looking disjointed, since you haven't taken the tail as a whole into
consideration, and using the copied curves trick will only get you a
start. You'll still need to adjust each section afterwards.
The second method is to animate the whole tail pose-to-pose, going
through your shot and blocking out the main poses and paying attention to
the arcs of the tail. The benefits of this method are that you can keep
track of the tail's curves more easily, and you also get a better sense
of weight since you're working with the whole tail and not one small
section at a time. However, the biggest disadvantage is that it can be
very easy to get overwhelmed by the amount of controls and lose track on
how the tail curves are supposed to move through your shot.
Choose whichever method you feel works best for you. Both are perfectly
fine to use, and if you find a different way of doing things that works
better for you, then go ahead and use it! But whichever method you use,
remember that the tail should work the same either way. Which brings us
to the next topic:
Tail Mechanics
So now that we have our ball going and our work method figured out, let's
get started with the tail! This actually won't be too long an explanation
because most of it you already know, having done the pendulum assignment.
Unlike the pendulum, which has a loose and uncontrolled overlapping
action, a tail has bones and muscles, which means that Tailor has much
greater control over its movements. It won't flop around behind him but
instead flow with a wave-like action, and settle as he slows down. Here's
an image to demonstrate the motion:
If you imagine the squirrel's hips as a ball, it will give you an almost
perfect representation of Tailor. And as you can see, while the hips
bounce up, the tail drags downward behind it in a C-shaped curve, because
the tail, just like the pendulum, wants to stay in place as long as
possible. Then, when the hips reach the peak, the tail catches up, going
into an S-shaped curve as the base of the tail follows the body and the
tip is still following the upward arc. Finally, the curve reverses into a
C as it drags upwards behind the dropping hips. It's important that the
tail tip flows along the same arc as the base of the tail, only delayed.
You can see it clearly in the first 4 drawings in the image above. Even
though the hips are already dropping to the ground, the tail tip is going
up along the path of the tail, and it's always pointed to where it was in
the last pose.
This dragging motion is what defines a good overlapping tail. If you have
the tip swinging stiffly up and down, or have the tail going up while the
ball goes up, and down as the ball drops down, then the tail isn't
overlapping, but moving against the motion of the driving force of the
the ball.
Here is a great example of overlapping in a tail in action. This is a
clip from the amazingly animated Sword in the Stone, and if you haven't
seen it yet, I highly recommend you check it out. It's a goldmine of
animation to study.
As you can see, when the squirrels start, their tails are curled into an
S-shape, keeping it up and out of the way. But as they start to run, the
tail drags behind, because of drag and for balance, overlapping in a
smooth wave-like motion. Then as they slow down and stop, their tails
curl back up behind them, settling into its original S-shaped curve.
Thanks CameronPratt.
But anyways here's my assignment... NEVER SKIP THIS ASSIGNMENT IF UR STARTING TO LEARN ANIMATION....
This is really getting Busy.. Its said right if u want to Do AM do it full time for making full use of... I can't believe 6 week and I made a lot more new Friends... we have also started to Hangout on Google+ Daily.... It really super Fun...
For this week Our Lecture was All abt overlapping action.. and We were also told cool trick to animate a pendulum By Bobby... I have my own trick to animate a Pendulum..Which I will say in While... I would Recommend U'll to go to this page....
It covers Almost every thing that was told to us in out lecture... I really like this Page very much... and then back to How I animate a Pendulum... U guys might have Watched Keith Lango's video on Animating a Pendulum..Those are very nice..If not I would recommend to go and watch them Now...
http://www.youtube.com/watch?v=UgwGWE3CUhk&feature=player_embedded (it has three parts)
But not Really wht I did.... I first animated my base (the Block) and the for the Settle I created the Extremes of my pendulum and then Selected the last three joints of the pendulum and moved the Keys of the Settle two frames ahead...and the again select the last two Controls and move the keys two frames ahead.. and then select the Last control and move the keys two frames ahead... Have the Graph of these keys to be Flat... Then Play it watch the Magic... But this method only works for the settle... For the part in the starting and middle section of the animation... I used my special Animator eye's... Some People also use this method to get Overlap in the body..but I don't like to do it this way for the Body... I prefer to go by posing the poses...
Anyways This Weeks assignment as U have known was to Animate a Pendulum... and yup no pose This week... Here's mine..
Looks like the journey is Getting started I got a little more busy than the Previous week. But I will try to post Every time I have time.
So this Week we had Shawn Kelly Explaining us about squash and Stretch... Squash and Stretch help in Giving life to the Character. Even to a Ball or to a Human Bi-ped Character.. Every thing squashes and stretches.. It Can be used to give anticipation in a Motion. Anticipation is very imp without anticipation the Animation looks Odd. and Don't Think that there is no Anticipation in real life.. Every thing anticipated before doing a action.. For Example if you want to jump your are going to go down a bit before you go up. If you want to Throw a Ball you have to move your hand back and then throw it Front..
Anticipation is Very imp.It brings Life to the Character like all the other principles it is also imp and necessary.. Anticipation tells the audiance that the character is going to do something and how strong the next action is going to be..Anticipation can also be used to add Comedy in our animation like having the Character anticipate as if he is going to hit hard or run very fast then then not to make him Go fast or hit hard.. This also looks nice because the audience would be Expecting something else and you give them something else..but not in all cases.. Sometime Anticipation is very subtle is not seen on the animation but just felt like the ball going a little back for one frame and then going front.. this is not seen but felt in the animation. All these small changes really make some Changes in the animation.
"Tell the Audience that you are going to do something. Do it. Then tell them you did". -Charlie Chaplin
And Then My assignment for this week was to animate a Obstacle Course with Squash and stretch and also Create a Pose Showing Devastation. and yup like always Planning them before animating them..its is very imp to plan before you animate. I must agree Obstacle is the best way to learn Timing. You should definitely try it It made me crazy for some time..